Telia Smart Connect is also available as an app on both the App Store and Google Play. This means that you can access your switchboard on your mobile devices with just a few taps, making it even more convenient to have full control.


Advanced Menu Selection
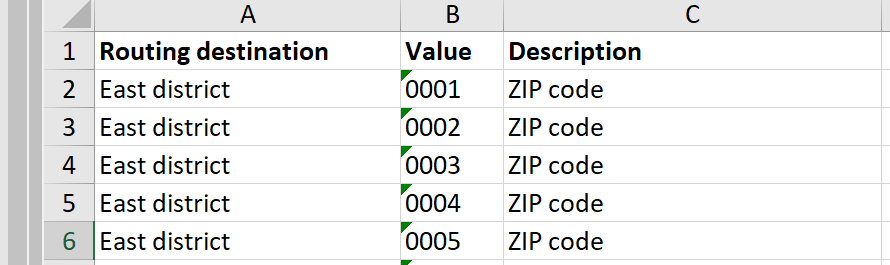
The advanced menu selection in the IVR enables the caller to enter more than one digit. The input will be checked against a routing list, and if matched, the call will be forwarded to the completed destination for that match (IVR or phone number). An example is to make geographical routing based on zip-code input from the caller. You then map all zip-codes to as many different destinations as you would like, and based on the zip code the caller enters a different main number call flow.
How to get started with advanced menu selection
- Navigate to the Administrator page from the main menu, then “Telephony Setup”
- Select «Advanced menu» to get started on the routing list
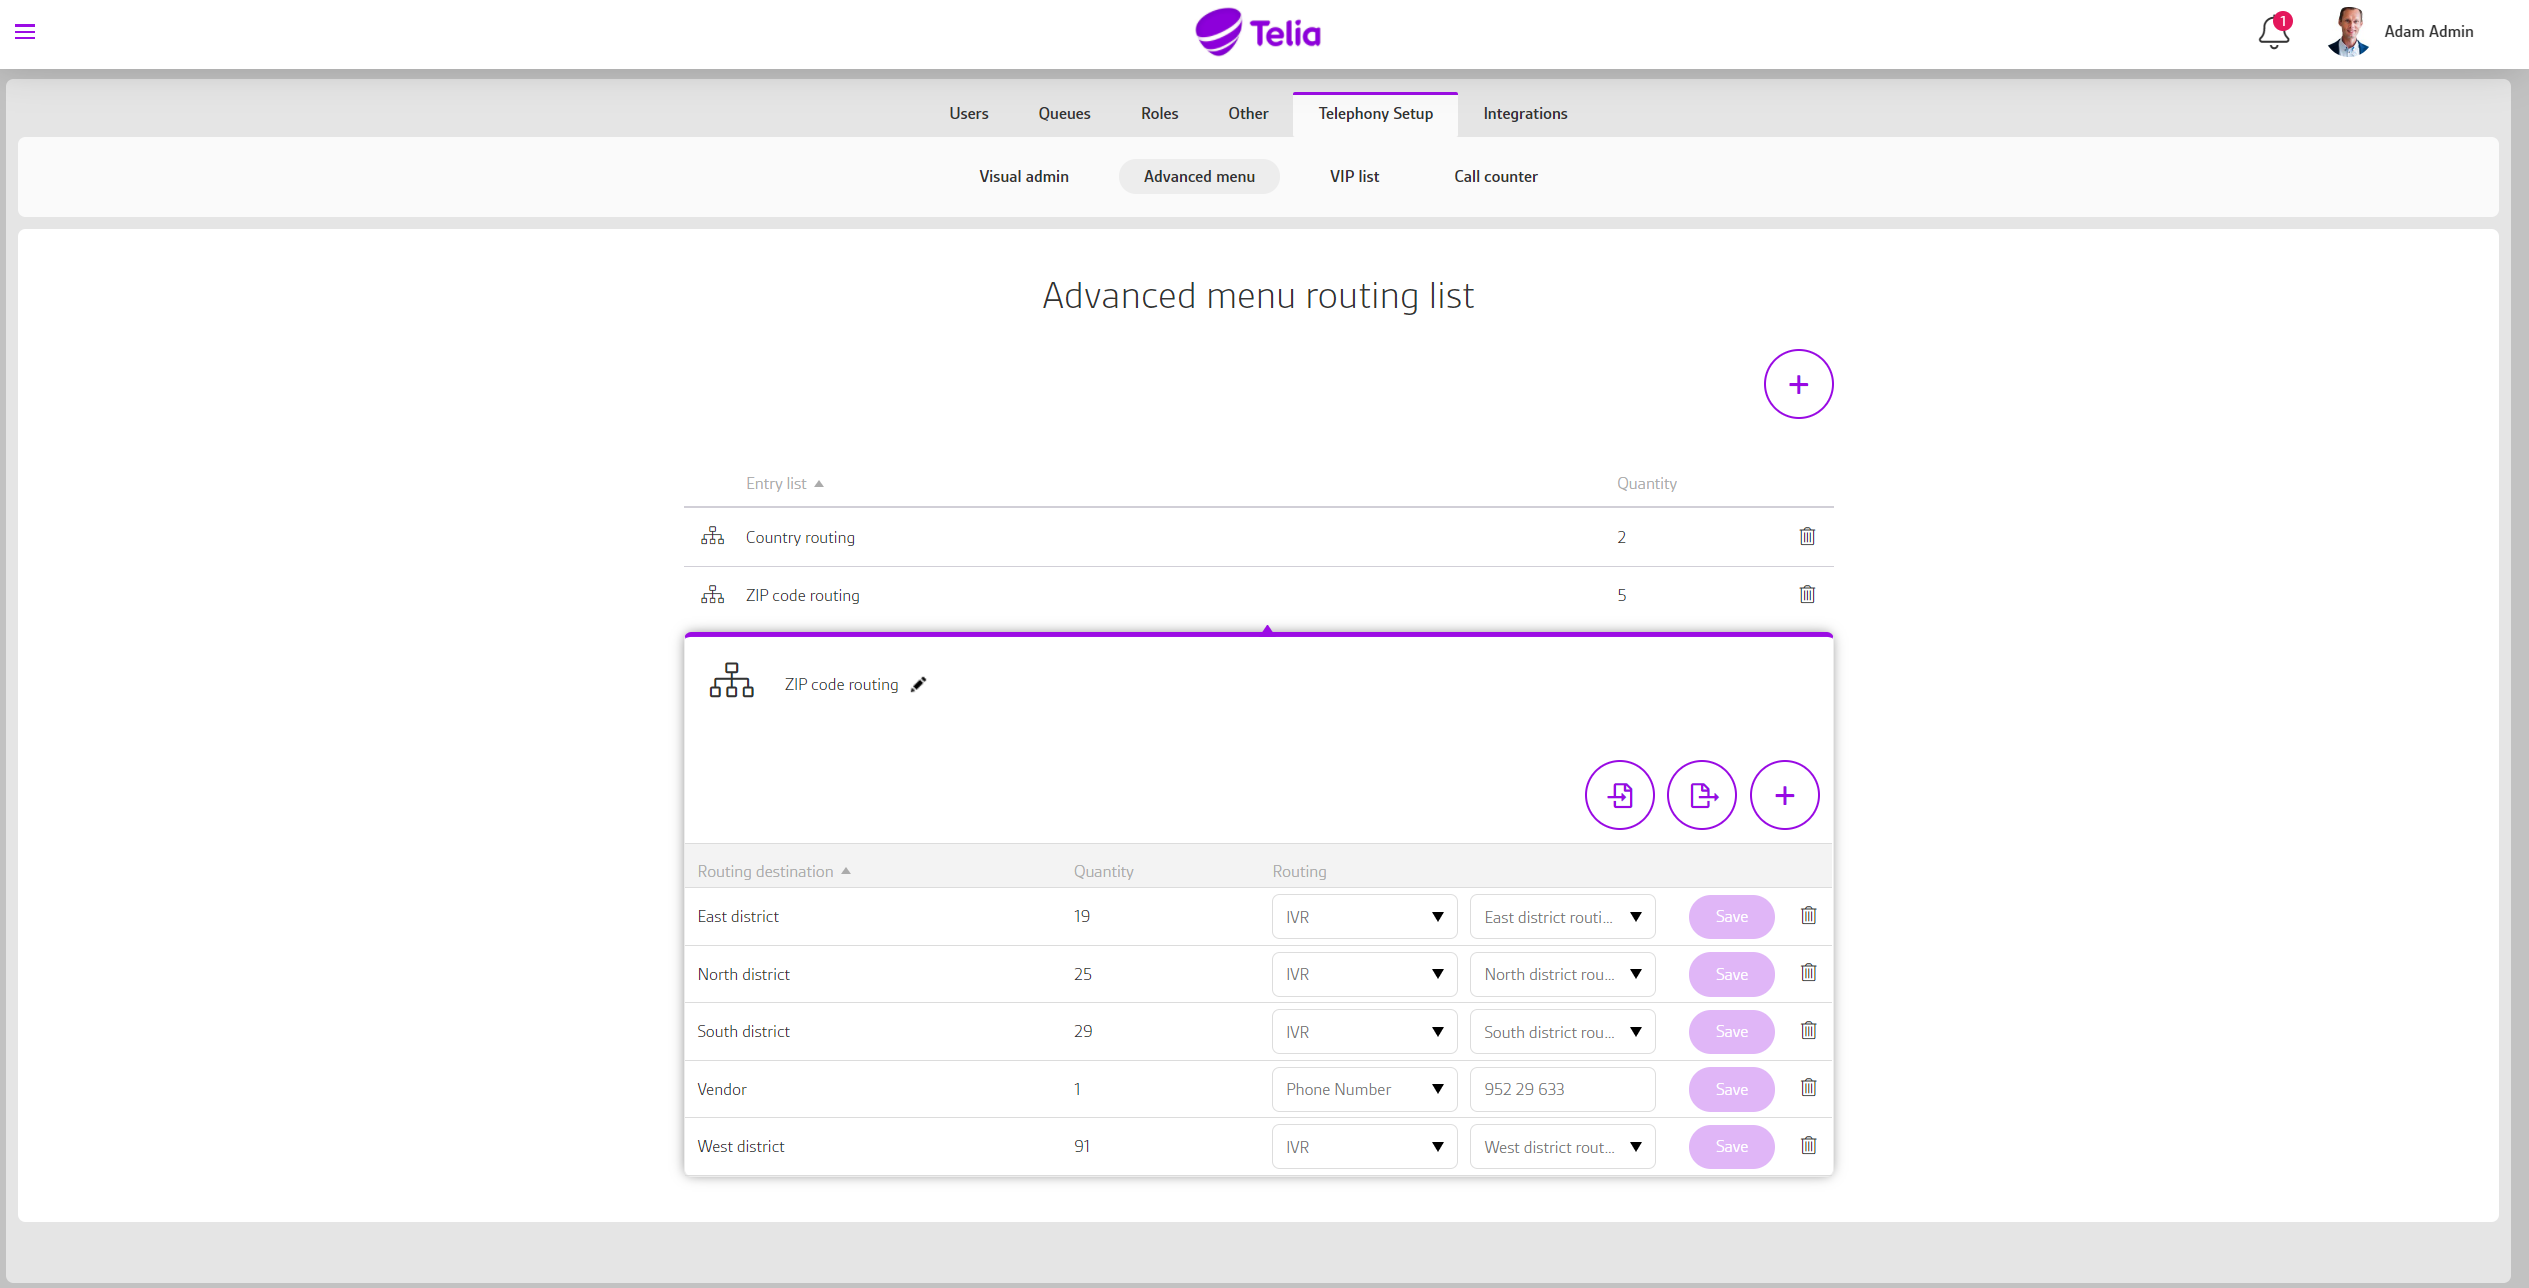
Advanced menu routing list
The routing list holds all valid inputs, and each input will be mapped to a routing destination.
Under the “Advanced menu”
- Press the “+” icon, to add a new routing list. Enter a name for your list, e.g. «zip-code routing».
- One routing list can have multiple destinations, so the next step is to create routing destinations: Expand the routing list and press the “+” icon inside the expanded view to create a routing destination.
- To add valid input values to a routing destination, you can either add one by one manually or you can import it from an Excel file (if you add one dial value for each routing destination you have a good template to work with). You can also export your list and mass update it externally in Excel.
Setup in IVR – Main number call flow
Once you are have completed the routing list, you can continue to the IVR to use it in a call flow.
- Navigate to Administrator page from the main menu, then “Telephony Setup”
- Select «Advanced admin» menu pane and press the «Click here to edit your Switchboard solution» button
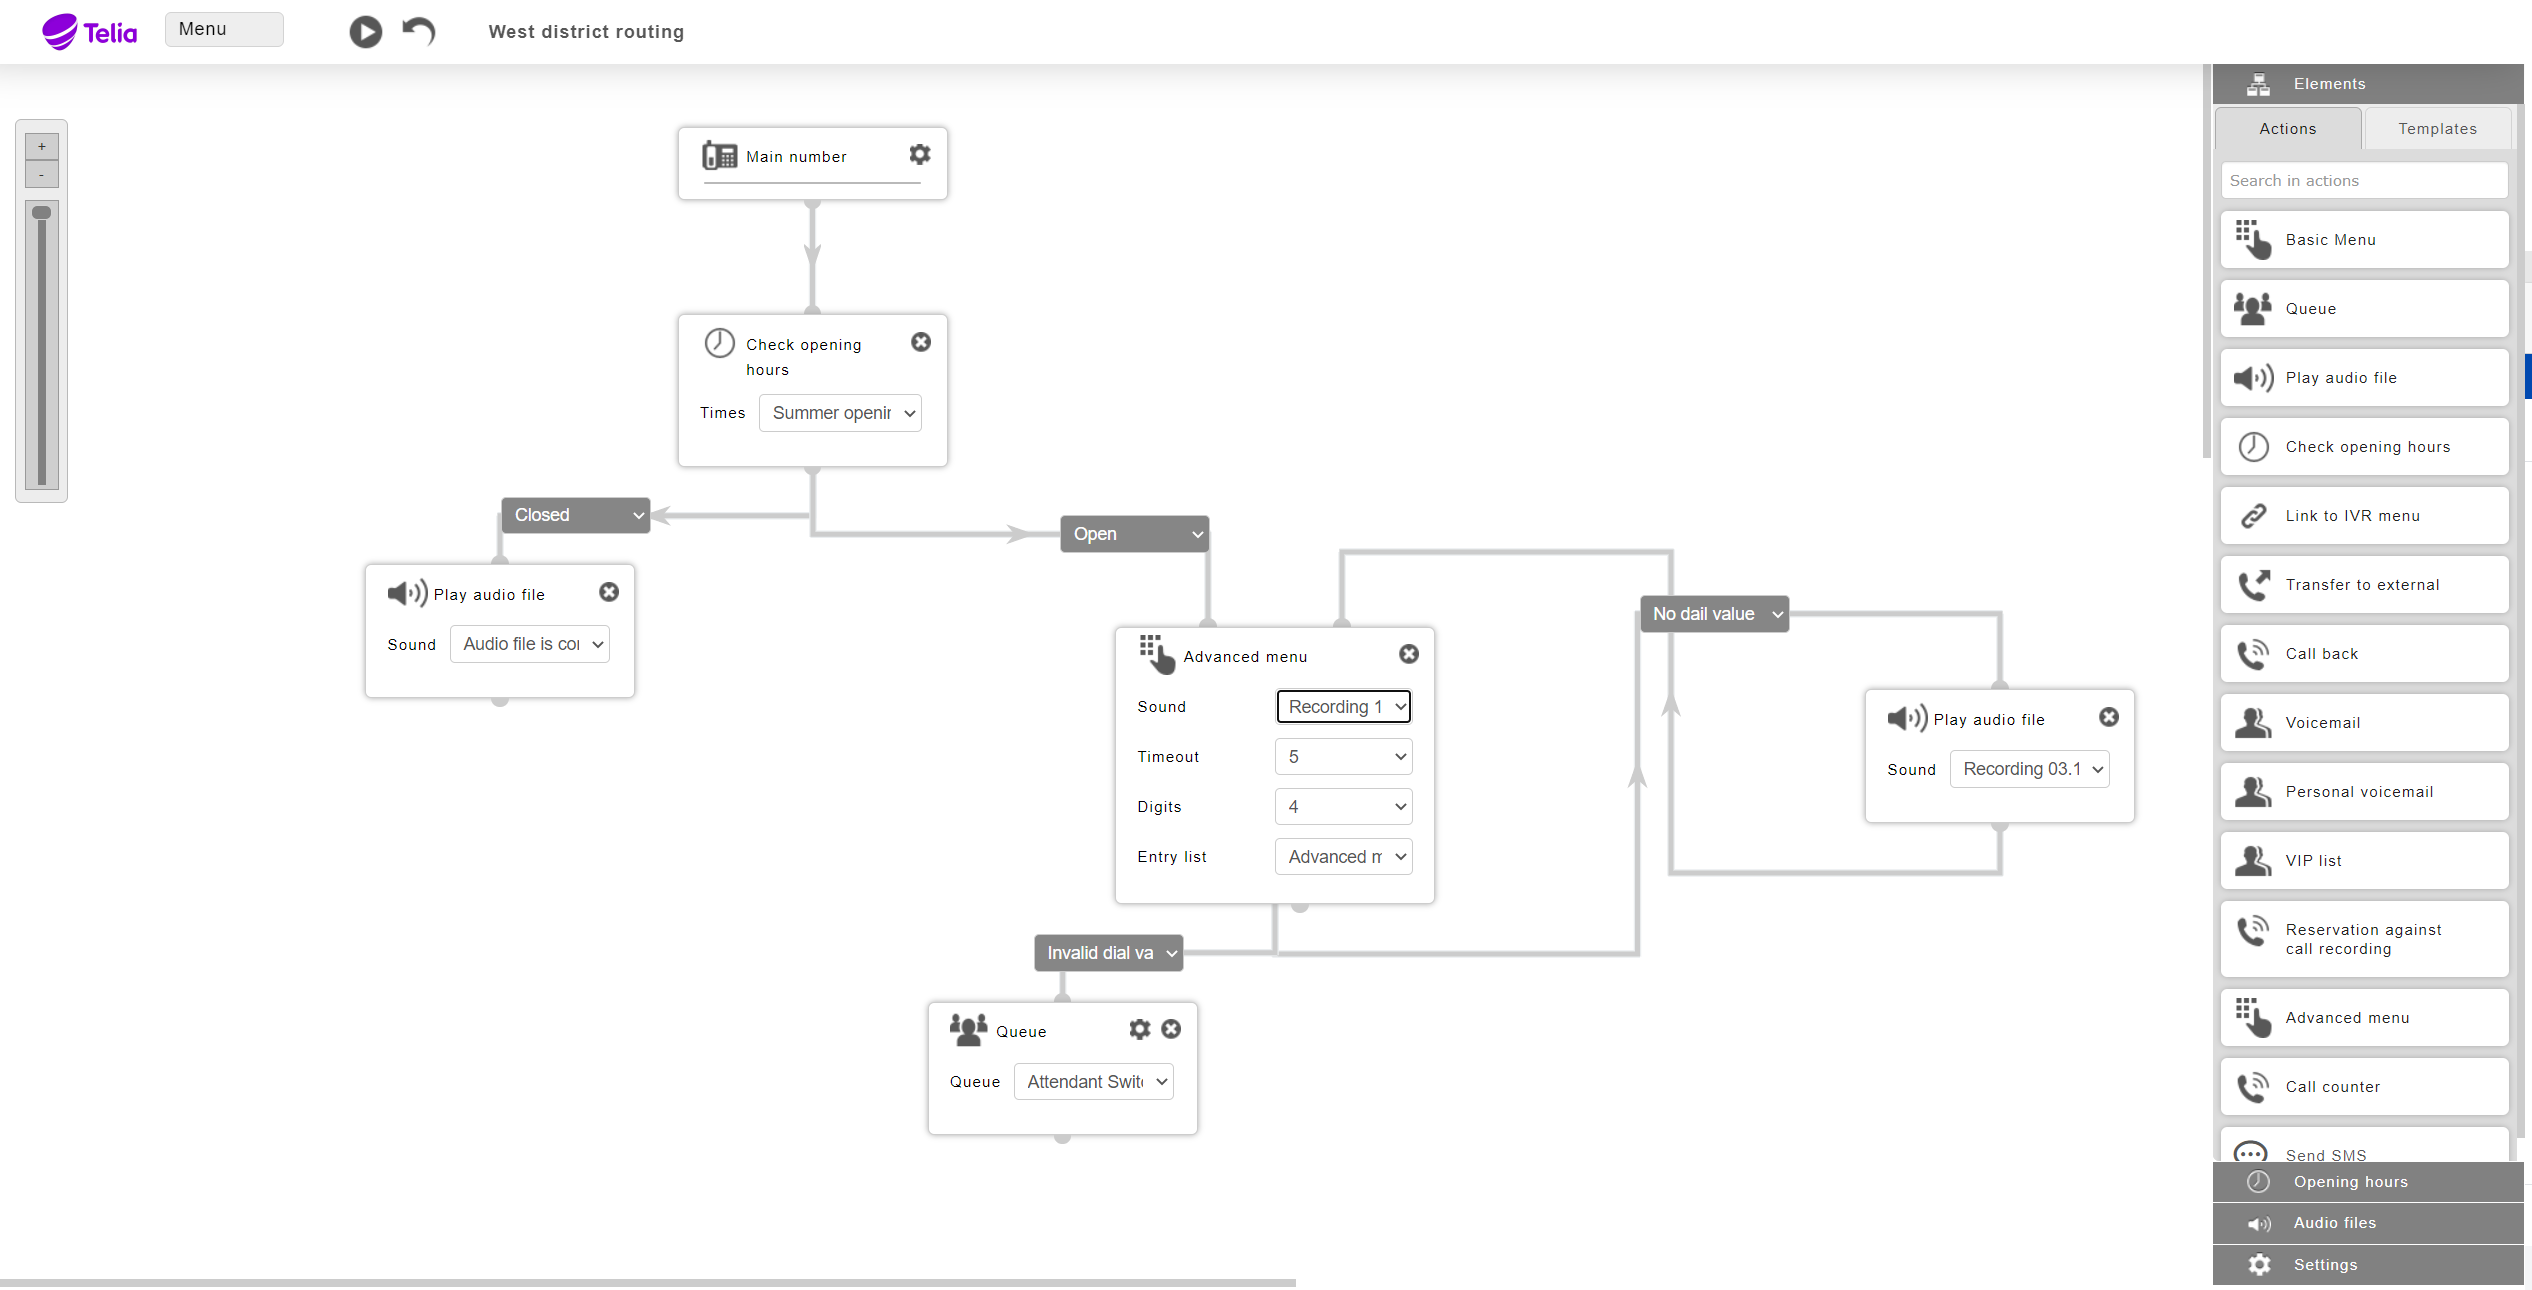
Drag the «Advanced menu» element into the call flow where you would like to use it.
- Select a sound message to inform the caller about the entering options.
- Add a timeout in seconds for how long the system should wait for input from the caller.
- Add a maximum number of digits entered that the system should wait for before it starts the routing.
- Select the Entry list/Routing list that you want to use. (See Advanced menu routing list)
Since the routing destination is part of the routing list, the only steps left are «Invalid dial value» and «No dial value».
User Guides
Here you can find user guides connected to the feature topic. If you can’t find what you are looking for here you might find it in our main user guide archive.
User Guides