
Telia Smart Connect is also available as an app on both the App Store and Google Play. This means that you can access your switchboard on your mobile devices with just a few taps, making it even more convenient to have full control.




Scheduled Reports
A scheduled report is an automated email that delivers a defined report at a set interval, daily, weekly, or monthly, so managers and team leads receive up to date figures on call volumes, queue performance, and agent activity without logging in to check. Reports can also be exported to Excel for further analysis.
Getting started
Before a report can be scheduled or exported, it must first be created.
- Open the main menu and select Statistics.
- Select the report type in the tabs.
- Adjust the report settings so the report displays the required data.
Available reports
All of the following reports can be scheduled and exported to Excel:
- Queue
- Queue – detailed
- Agent
- Agent – detailed
- Agent – SMS
- Call counter
- Call tags
- Queue call log
- Direct call log
Scheduled report
A scheduled report is sent automatically by email at a set interval.
To set up a scheduled report:
- Open the report to be scheduled.
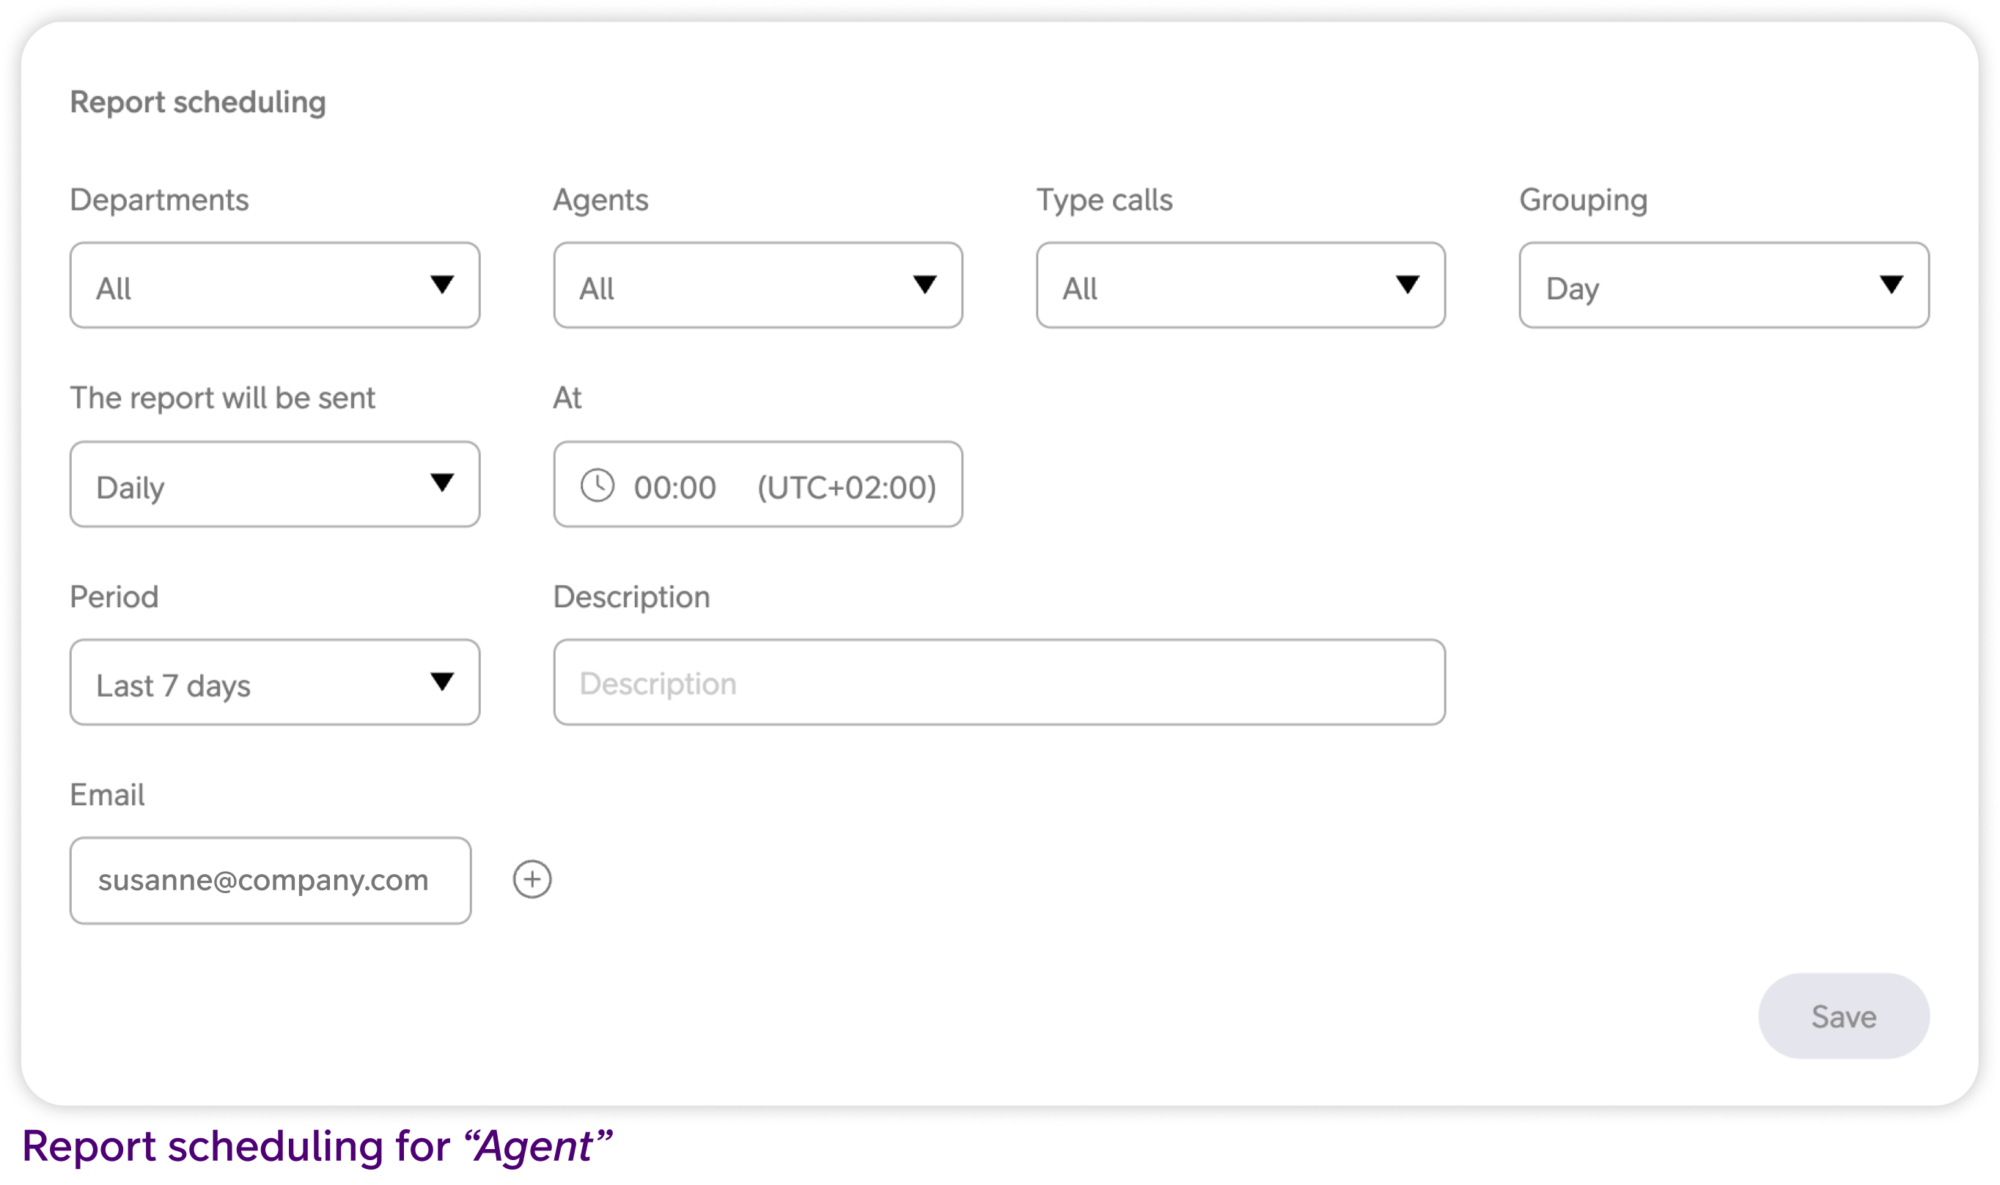
- Click the email icon to open the Report scheduling panel.
- Select which data the report should cover using the filter dropdowns. The available filters vary by report type and may include Departments, Agents, and Type calls.
- Under Grouping, select how the data should be sorted and presented, for example by day.
- Under The report will be sent, select Daily, Weekly, or Monthly.
- Under At, set the time of day the report should be sent. The time zone is shown next to the field.
- Under Period, select how much history the report should contain: last 7 days, last week, last 30 days, or last month.
- Under Description, enter a description to identify the report in the email.
- Enter the recipient’s address in the Email field. To add further recipients, click the + icon next to the field and enter the next address.
- Click Save.
An overview of all scheduled reports that have been scheduled can be found in the tab Report scheduling. From here, existing schedules can be adjusted and recipients added or removed. Click the report you wish to edit, or click the trash can to delete.
Export to Excel
All report types can be exported to Excel for further processing.
- Open the report to be exported.
- Adjust the report settings so the report displays the required data.
- Click the Excel icon to download.
User Guides
Here you can find user guides connected to the feature topic. If you can’t find what you are looking for here you might find it in our main user guide archive.
User Guides