Telia Smart Connect is also available as an app on both the App Store and Google Play. This means that you can access your switchboard on your mobile devices with just a few taps, making it even more convenient to have full control.


Mobile App – Audio Files
The Audio Files feature in the Smart Connect mobile app allows administrators to create, manage, and organize audio files directly from their phones. With this functionality, audio file management becomes faster and more flexible — no need to access the web interface for everyday updates.
Using the mobile app, administrators can:
-
Create new audio files by recording directly in the app or using text-to-speech.
-
Upload existing audio files from the device for use in call flows.
-
Organize files into categories for easier management and consistent structure.
-
Edit and delete files or categories directly within the app.
-
Preview and manage recordings to ensure quality before publishing.
Audio files
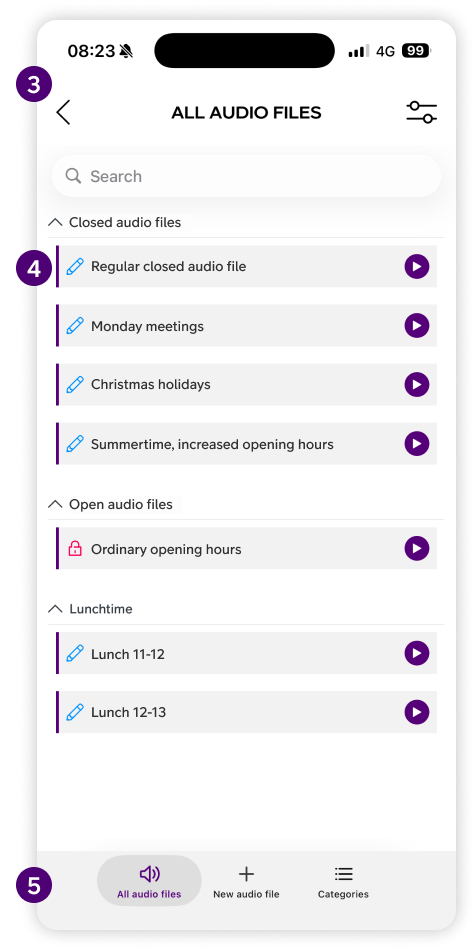
All audio files are listed in the app and grouped by category. You can scroll through the list, filter by category, or use search to quickly find a specific file.
-
Click the play icon next to a file to preview it.
-
Click the pen icon to edit the file, for example change the name or category.
Categories
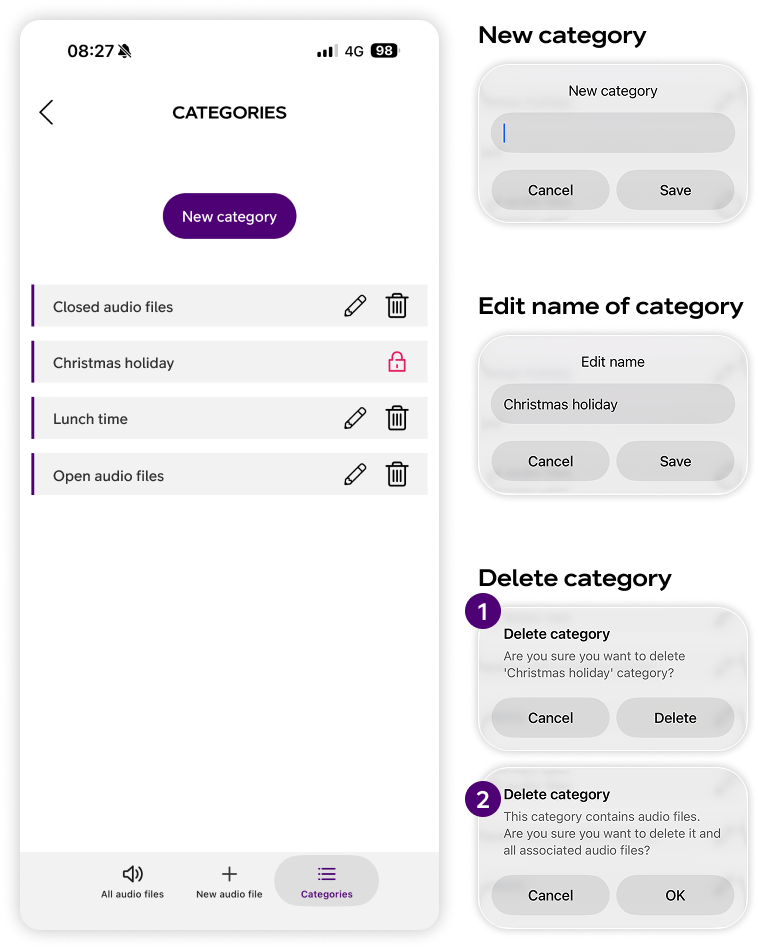
Categories make it easier to structure large audio libraries, for example “Welcome messages,” “Queue announcements,” or “Closed messages.” Administrators can create new categories, rename existing ones, or delete categories when no longer needed.
-
Tap New category to create a new one
-
Tap the pen icon to rename
-
Tap the trash icon to delete
If a category with existing audio files is deleted, a notification will be displayed warning you before proceeding.
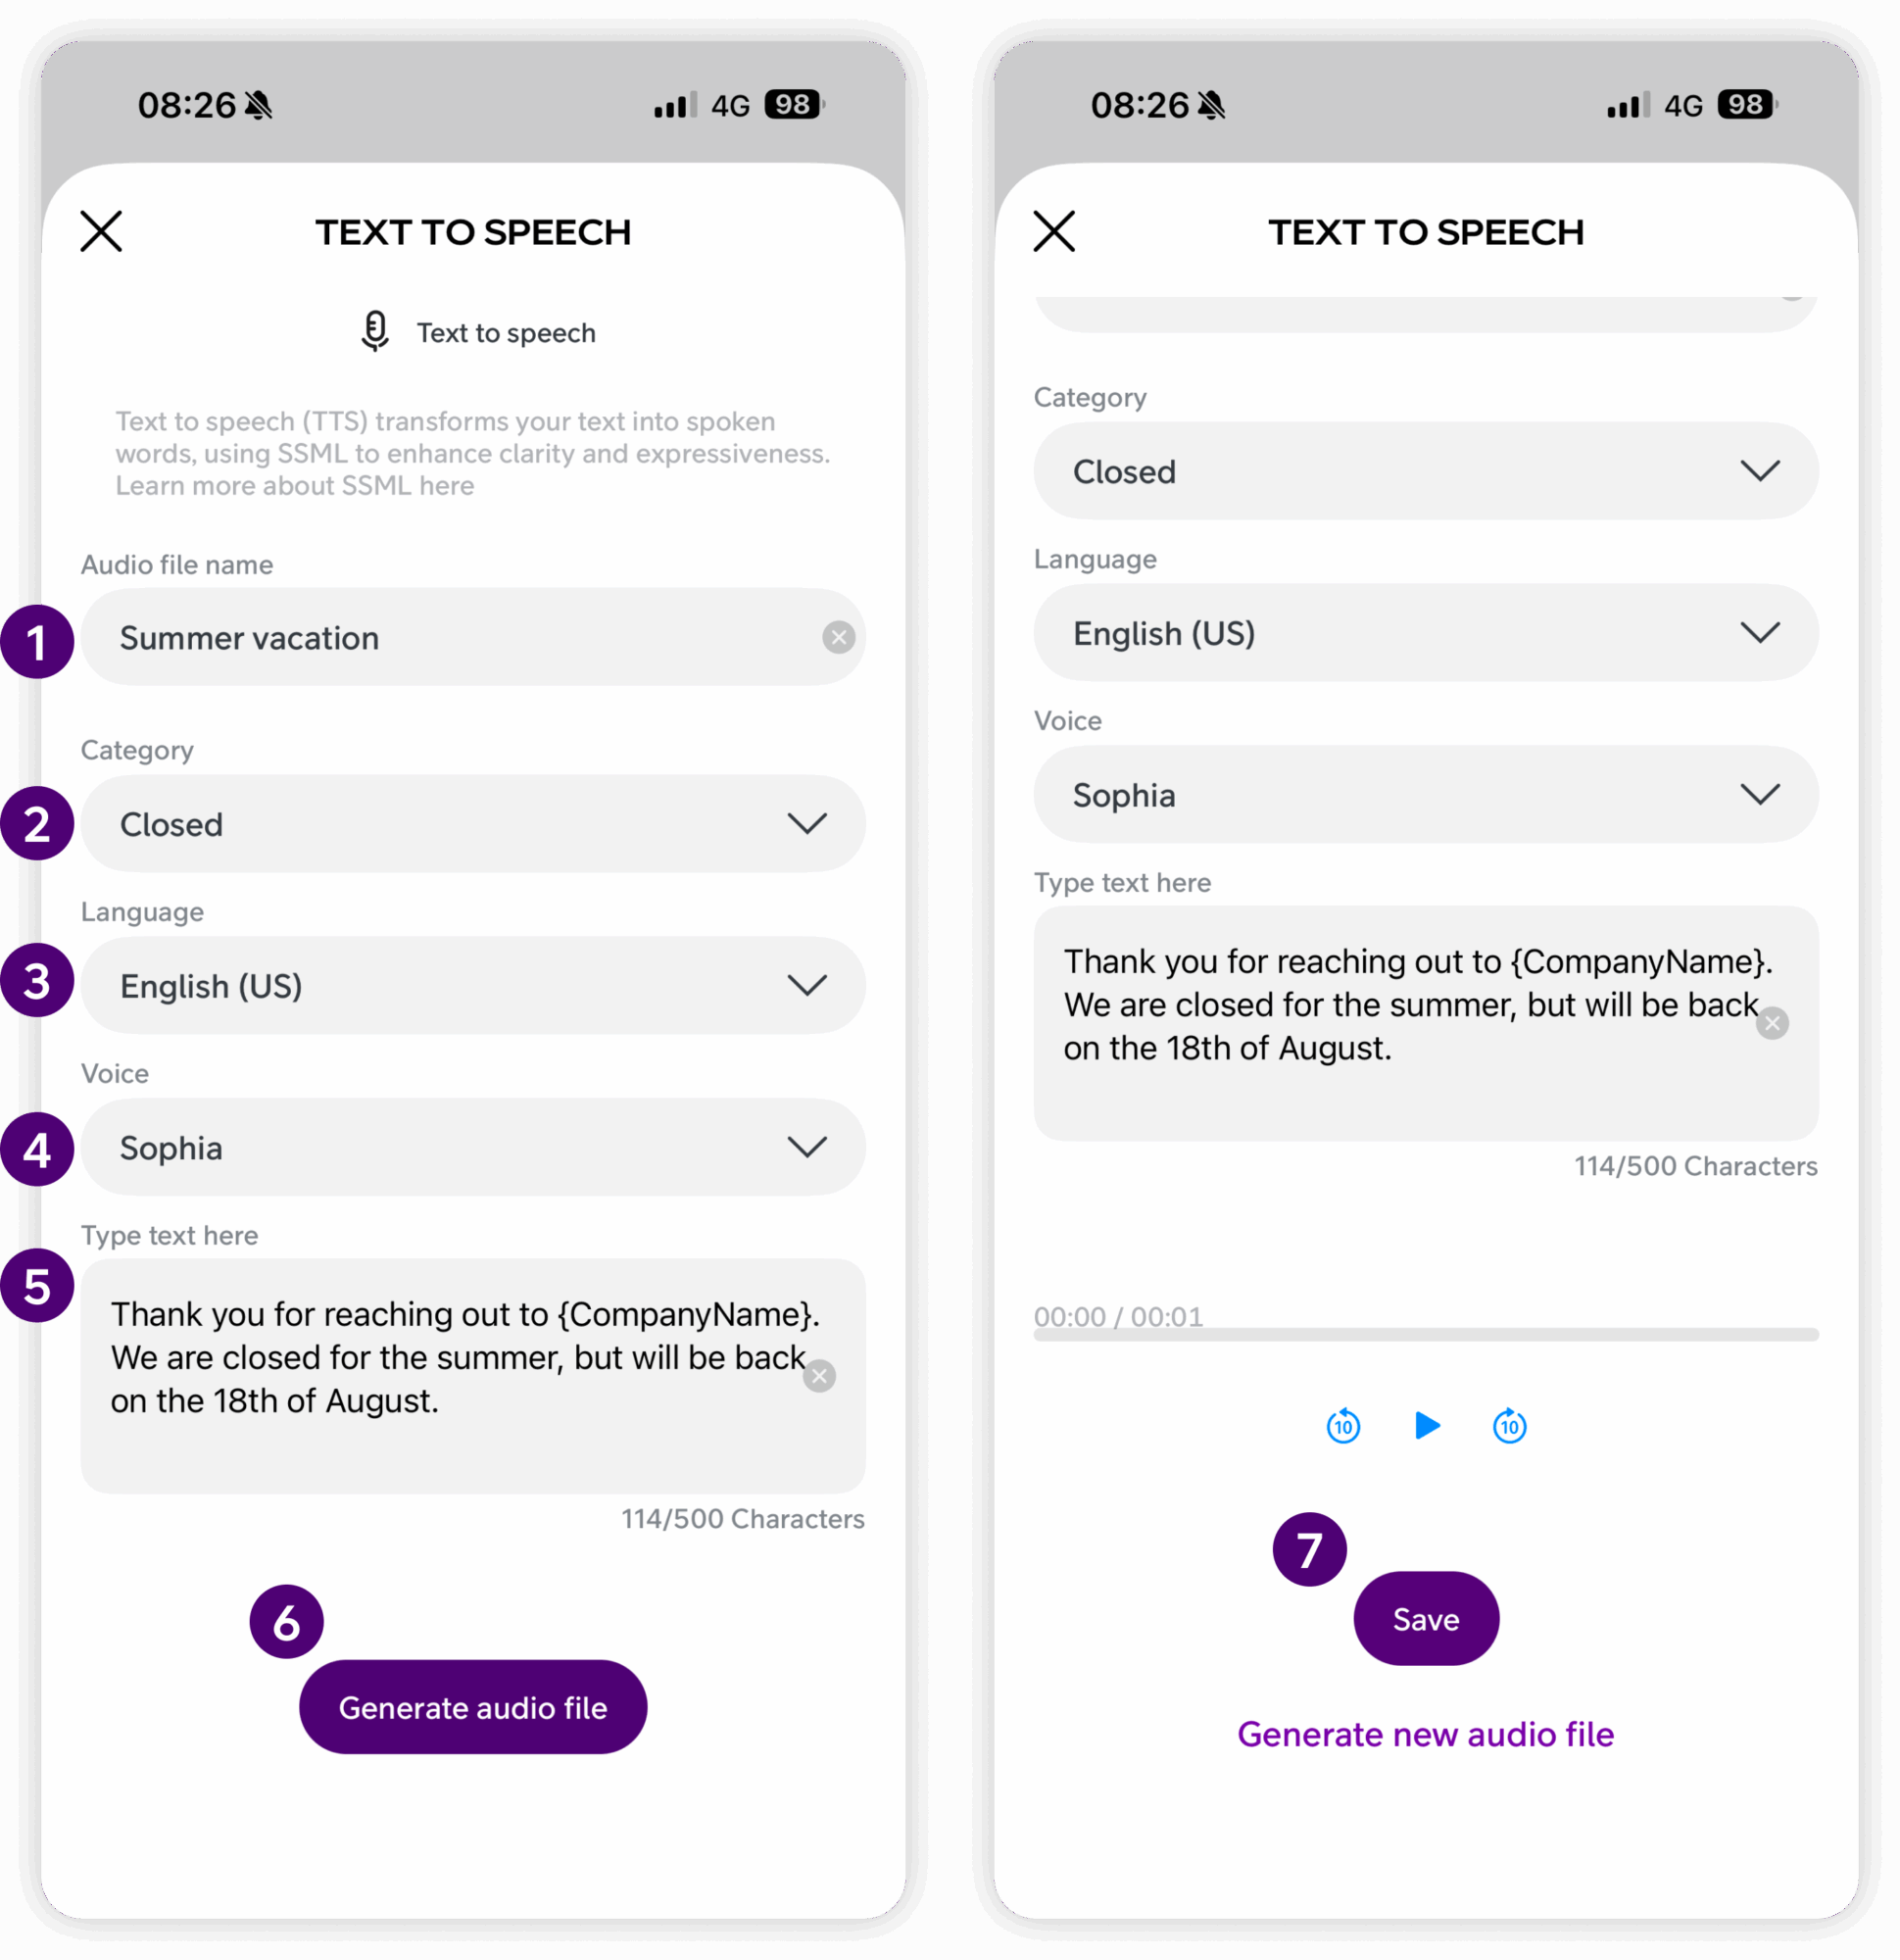
Creating a new audio file
You can create new audio files in three ways: Record, Text to speech, or Upload. All options are found under New audio file in the bottom navigation.
Text-to-speech
Text-to-Speech (TTS) converts written text into spoken audio, using SSML to improve clarity and expressiveness. This ensures consistent, high-quality audio files with the same voice across the company.
Step-by-step:
-
Type the name of the audio file
-
Select category
-
Select language
-
Choose voice (for consistency, consider using the same voice for all recordings)
-
Enter the message you want spoken
-
Tap Generate audio file
-
Tap Play to listen
-
Tap Save
Click “Generate new audio file” if you want to start over.
FAQ
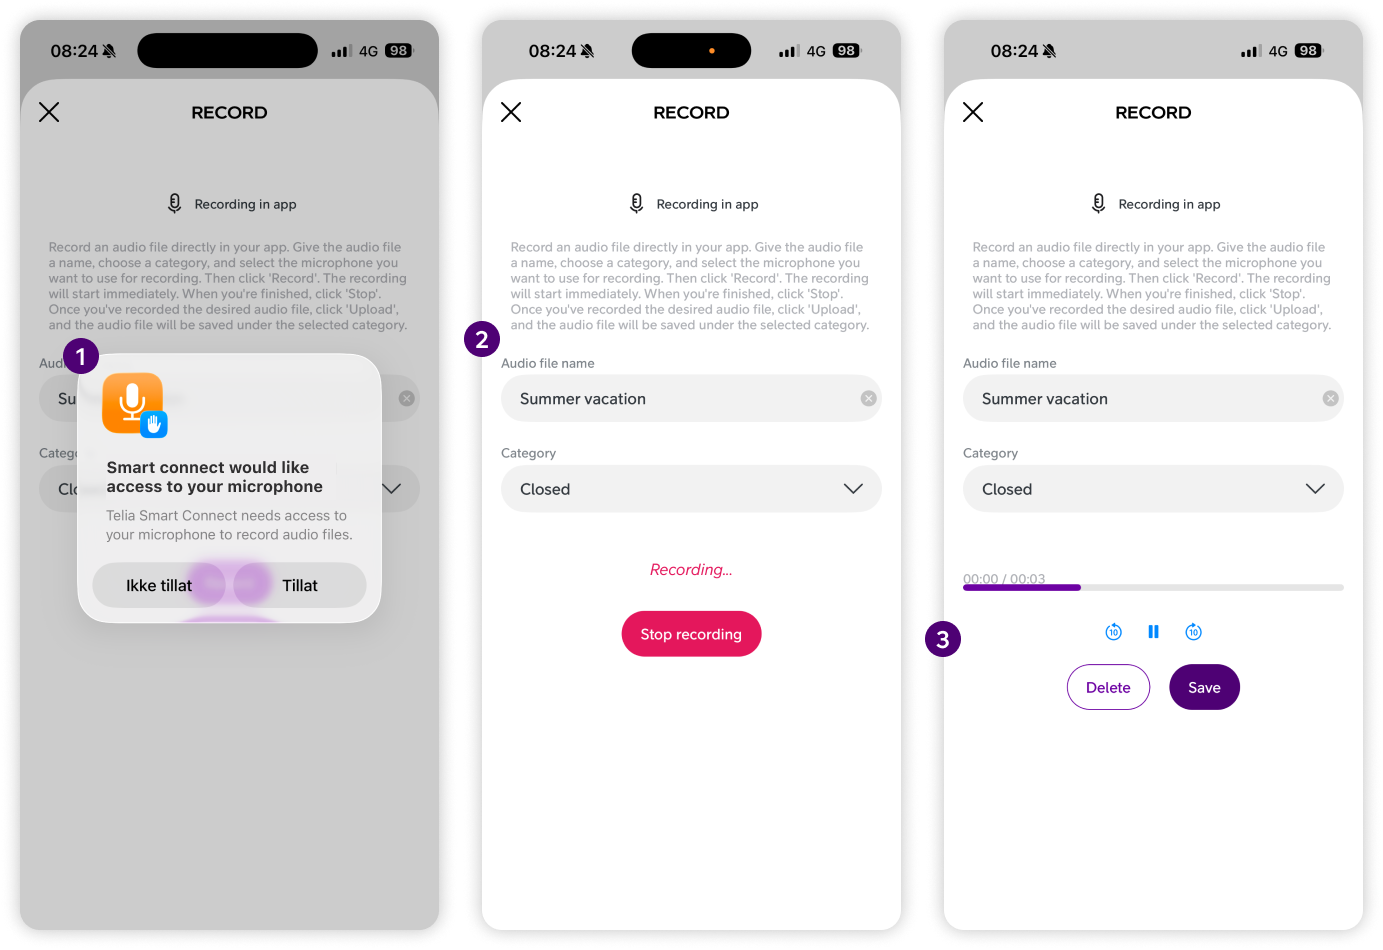
Q: How do I create a new audio file by recording directly in the app?
A:
Follow these steps to record and save a new audio file:
-
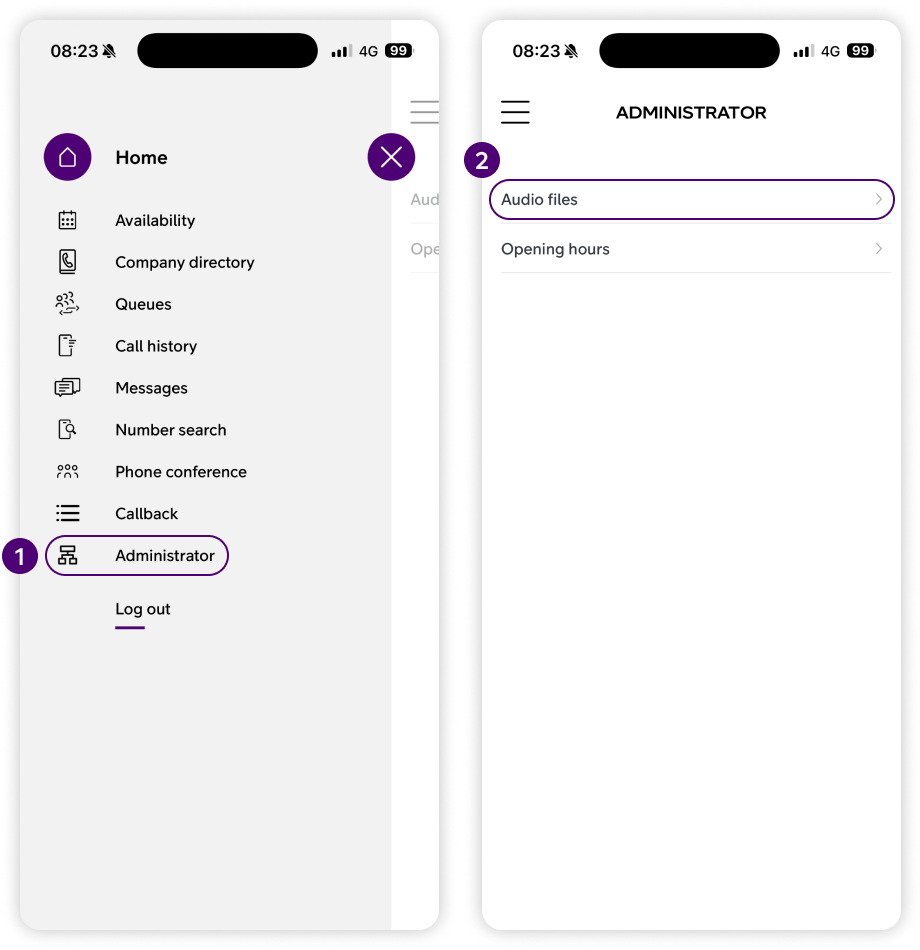
Click the side menu ☰ in the upper left corner.
-
Click Administrator.
-
Click Audio Files.
-
Select the New audio file tab in the bottom menu.
-
Tap Record.
-
Enter a name for the audio file.
-
Select the category where the file should be saved.
-
Choose the microphone you want to use.
-
Tap Record again to begin recording.
-
Tap Stop when you are done.
-
Preview the recording if needed.
-
Tap Save to save the file into the selected category.
Q: How do I create a new audio file using text-to-speech (TTS)?
A:
To use text-to-speech to generate an audio file:
-
Click the side menu ☰ in the upper left corner.
-
Click Administrator.
-
Click Audio Files.
-
Select the New audio file tab in the bottom menu.
-
Tap Text to speech.
-
Enter the name of the audio file.
-
Select the category where it will be stored.
-
Select a language.
-
Select a voice.
-
Type the message you want the system to speak.
-
Tap Generate audio file to create the audio.
-
Tap Play to listen and adjust if needed.
-
Tap Save when the audio sounds correct.
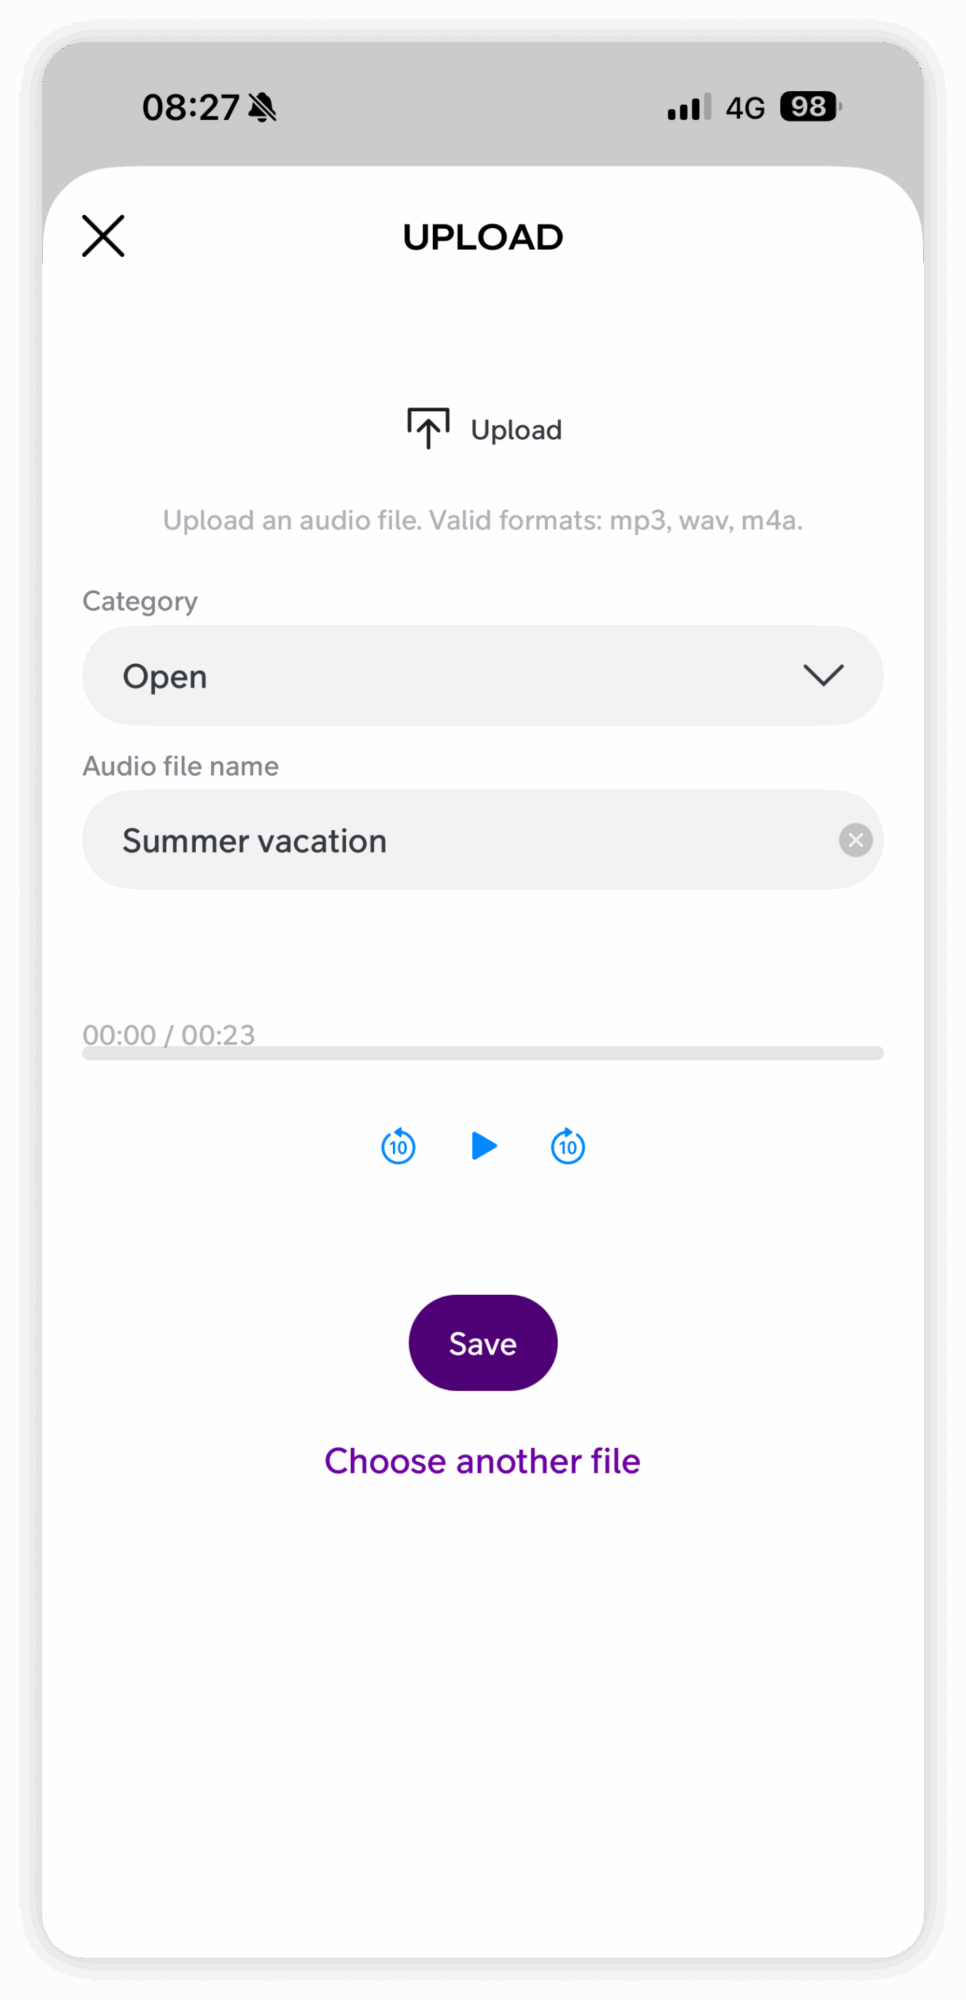
Q: How do I upload an existing audio file from my phone?
A:
To upload a file you already have recorded:
-
Click the side menu ☰ in the upper left corner.
-
Click Administrator.
-
Click Audio Files.
-
Select the New audio file tab in the bottom menu.
-
Tap Upload.
-
Select the category where the file should be saved.
-
Tap Add audio file.
-
Choose the audio file from your phone’s file picker.
-
(Optional) Rename the file by tapping the Audio file name field.
-
Tap Save to finalize and save it.
Q: How do I rename or change category of an existing audio file?
A:
To rename or change category of an audio file:
-
Click the side menu ☰ in the upper left corner.
-
Click Administrator.
-
Click Audio Files.
-
Make sure you are in the Audio files tab in the bottom menu.
-
Find the audio file you want to edit.
-
Tap the pen icon next to the file.
-
Rename or change category, depending on what you want to do.
-
Click Save.
Q: How do I create, rename, or delete a category?
A:
To manage your categories:
-
Click the side menu ☰ in the upper left corner.
-
Click Administrator.
-
Click Audio Files.
-
Select the Categories tab in the bottom menu.
Create a category:
5. Tap New category.
6. Enter the category name.
7. Tap Save.
Rename a category:
5. Tap the pen icon next to the category.
6. Edit the name.
7. Tap Save.
Delete a category:
5. Tap the trash icon next to the category.
6. Confirm deletion (note: any audio files inside the category will also be removed).
User Guides
Here you can find user guides connected to the feature topic. If you can’t find what you are looking for here you might find it in our main user guide archive.
User Guides