Telia Smart Connect is also available as an app on both the App Store and Google Play. This means that you can access your switchboard on your mobile devices with just a few taps, making it even more convenient to have full control.


Audio Files
Audio files allow callers to hear important information both during and outside the company’s opening hours. Audio announcements can be used to share opening hours, inform about menu selections, or provide helpful instructions before connecting them to a queue.
With the updated Audio files module, administrators can:
-
Upload audio files
-
Record in browser
-
Record through phone
-
Write text prompt and generate audio through TTS (text-to-speech).
How to get started
- Click the main menu ☰ in the upper left corner.
- Click Administration.
- Select the tab Telephony setup.
- Click Audio Files.
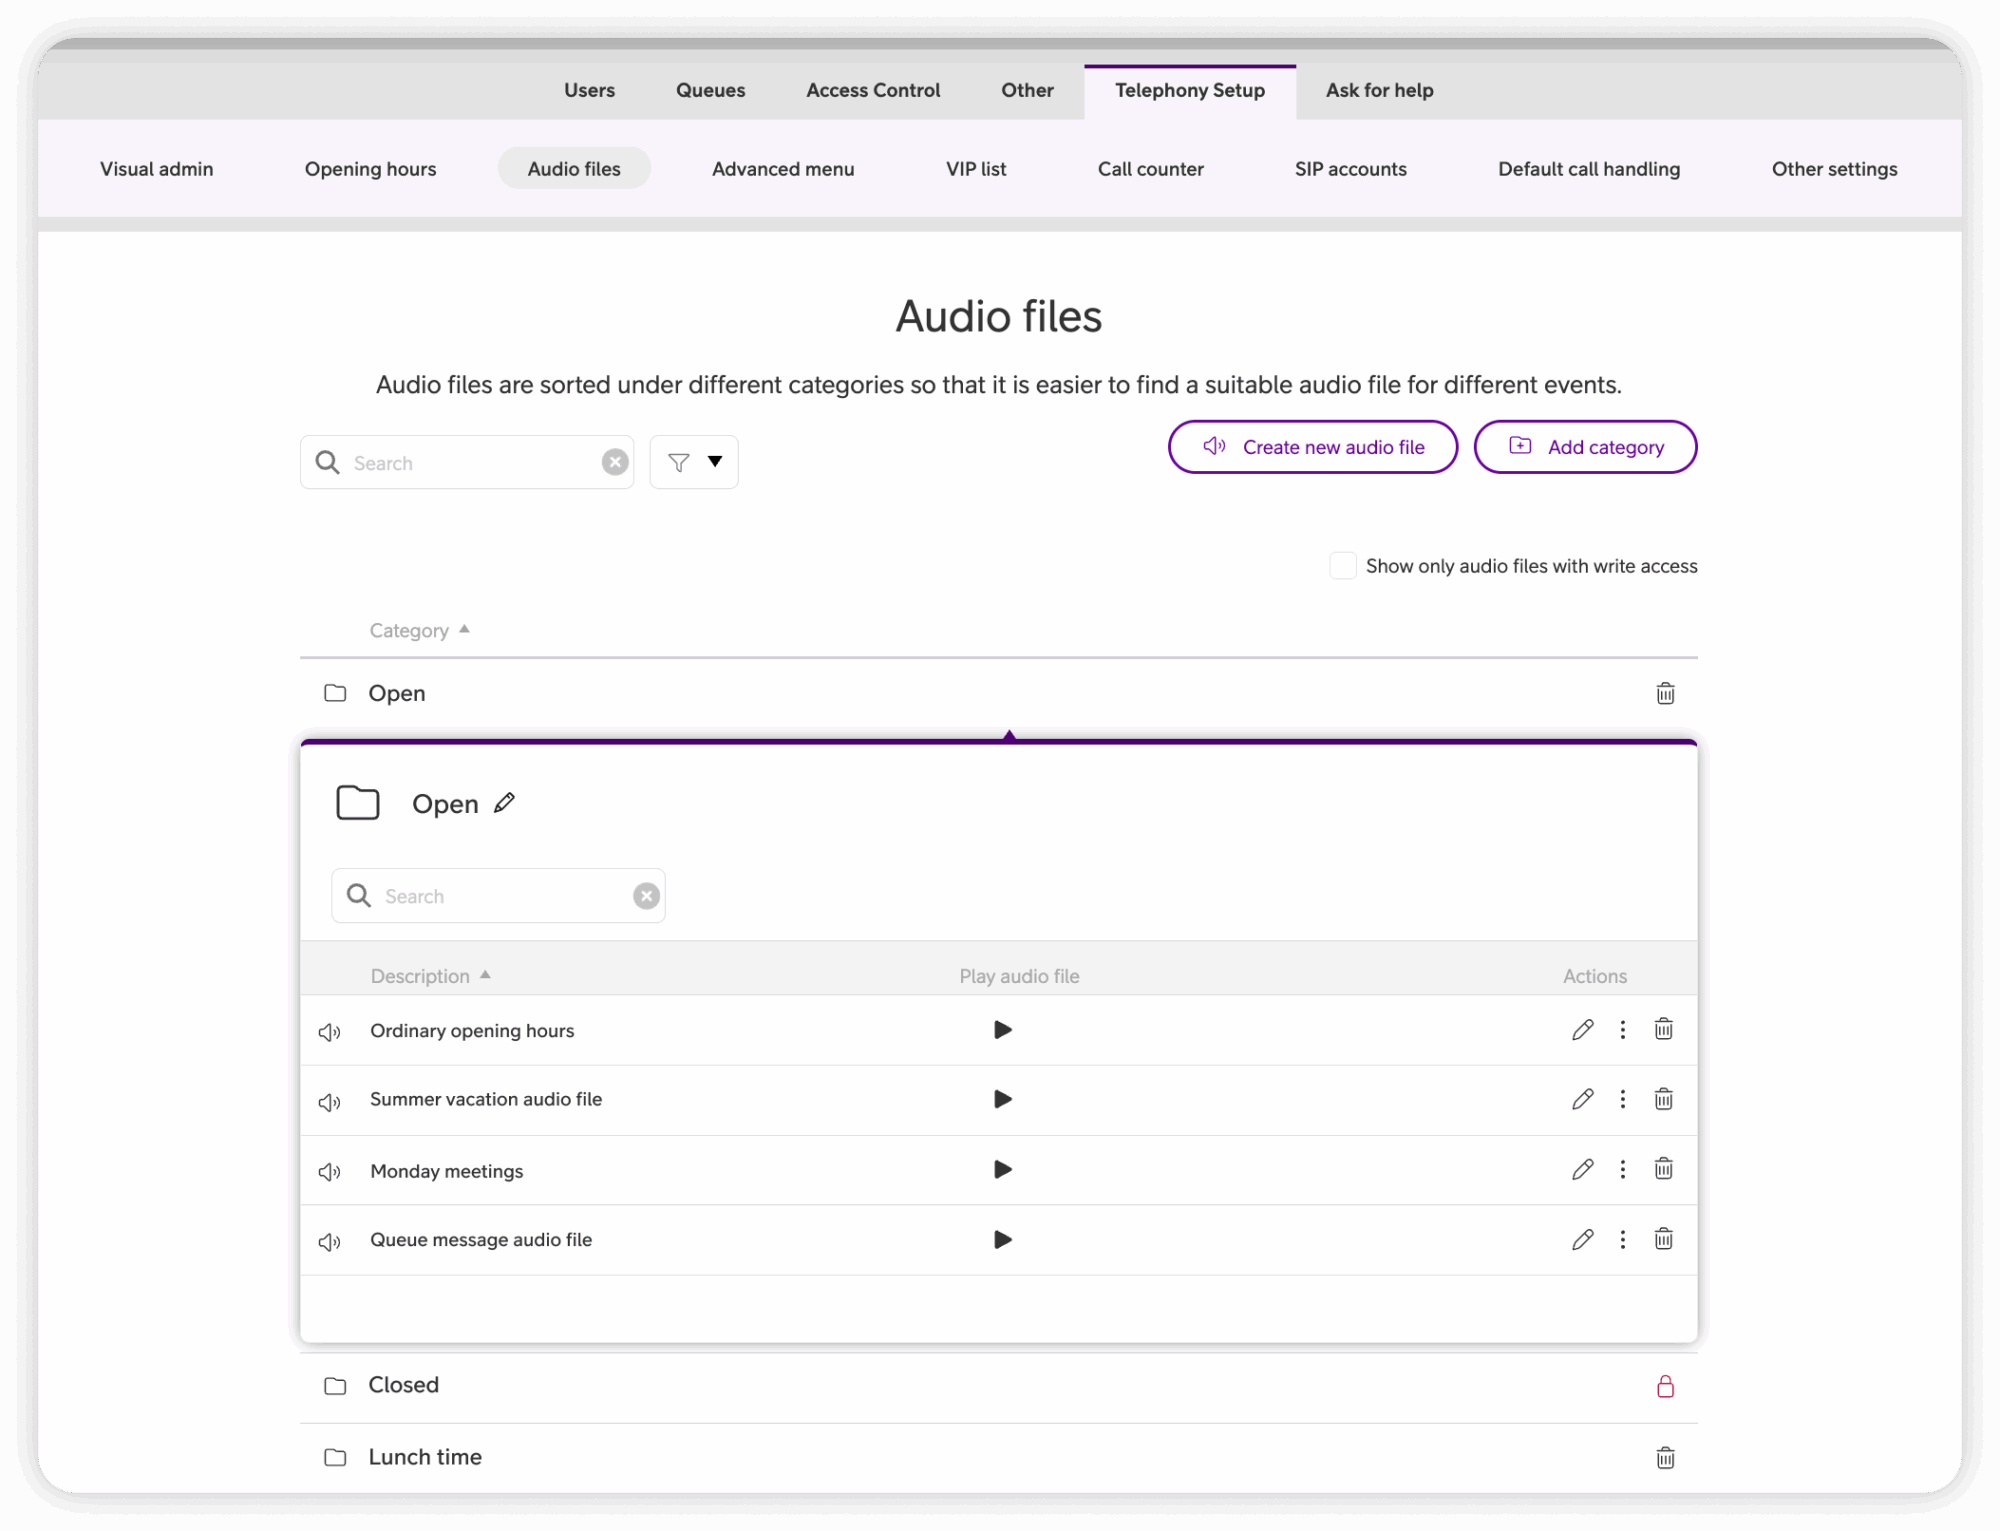
When entering the Audio files module, all existing files are listed by category. It’s possible to:
-
Filter by category
-
Search for specific files
-
Preview files using the play button
-
Edit name or category with the pen icon
-
Delete files using the trash icon
-
Create new categories, by clicking New category in the upper right corner.
Create a new audio file
You can create audio files in several ways:
-
Text to speech
-
Recording in web browser
-
Record by telephone
-
Upload an audio file
Each option is detailed below.
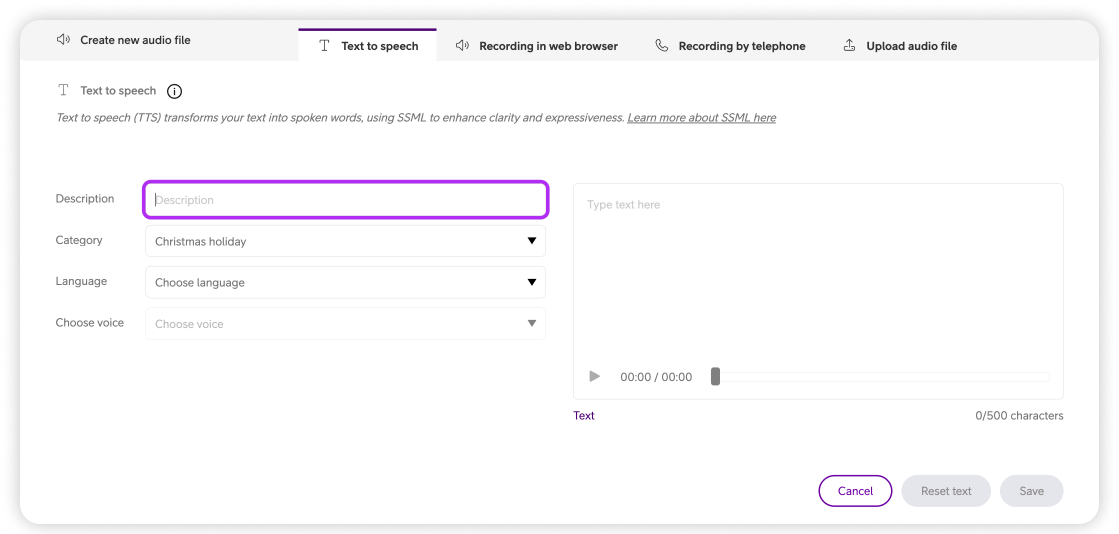
Text-to-Speech
Text-to-Speech converts written text into spoken audio using SSML, ensuring clarity and consistent voice quality across all prompts.
To create a new TTS audio file:
-
Click Create new audio file.
-
Select the Text to speech tab.
-
Type the name of the prompt.
-
Select category.
-
Select language.
-
Choose a voice (for consistency, consider using the same voice in all audio files).
-
Write your message.
-
Press Play to preview the audio.
-
Adjust if needed.
-
Click Save.
Advanced users can switch from Text to SSML for more controlled speech formatting.
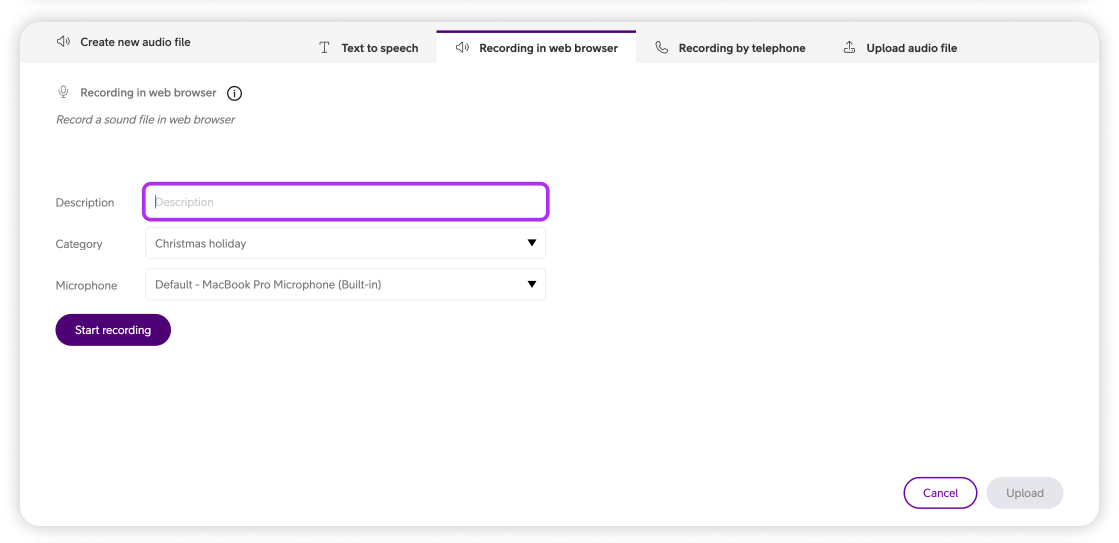
Recording in web browser
Administrators can record audio directly in the browser:
-
Click Create new audio file.
-
Select the Record in browser tab.
-
Enter a name.
-
Choose a category and microphone.
-
Click Start recording — recording starts immediately.
-
Click Stop when finished.
-
Click Upload to save the file.
Recording by telephone
This method lets you record audio directly through a phone call:
-
Click Create new audio file.
-
Select Record by telephone.
-
Enter your phone number.
- Select Category.
-
Click Call number.
-
Answer the call and record your message.
-
End the call when finished — the recording is saved automatically.

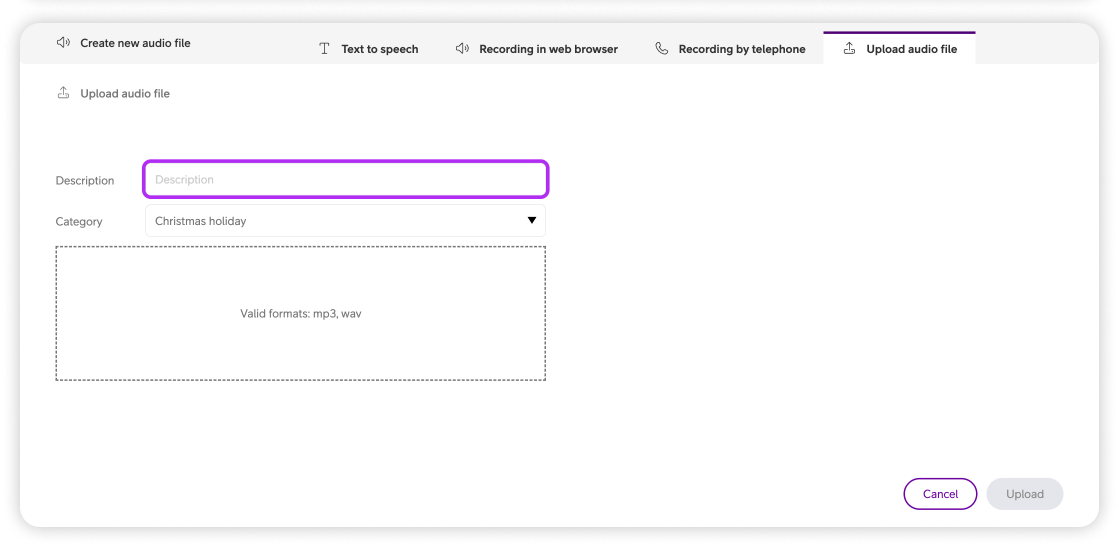
Upload audio file
If you already have a prerecorded message:
-
Go to Audio files.
-
Click Create new audio file.
-
Select Upload file.
-
Choose a Category.
-
Click the dotted rectangle and select file, or drag and drop files.
-
Click Upload.
Your file will appear in the selected category.
Note: The maximum allowed audio file size is 20 MB, and the maximum duration is 180 seconds.
User Guides
Here you can find user guides connected to the feature topic. If you can’t find what you are looking for here you might find it in our main user guide archive.
User Guides