
Telia Smart Connect is also available as an app on both the App Store and Google Play. This means that you can access your switchboard on your mobile devices with just a few taps, making it even more convenient to have full control.


Access Control
Access Control enables you to add or restrict access to functionality. A team leader can for example administrate queues by logging members in and out of queues. Before determining the role, you should consider:
- Who should have access to what kind of functionality?
- Access to functionality should be according to the company’s needs or policy.
- Should you use the standard system roles or create customized roles?
How to get started with Access Control
- Open the main menu ≡ and go to Administration.
- Choose Access Control.
- Click a role to open it.
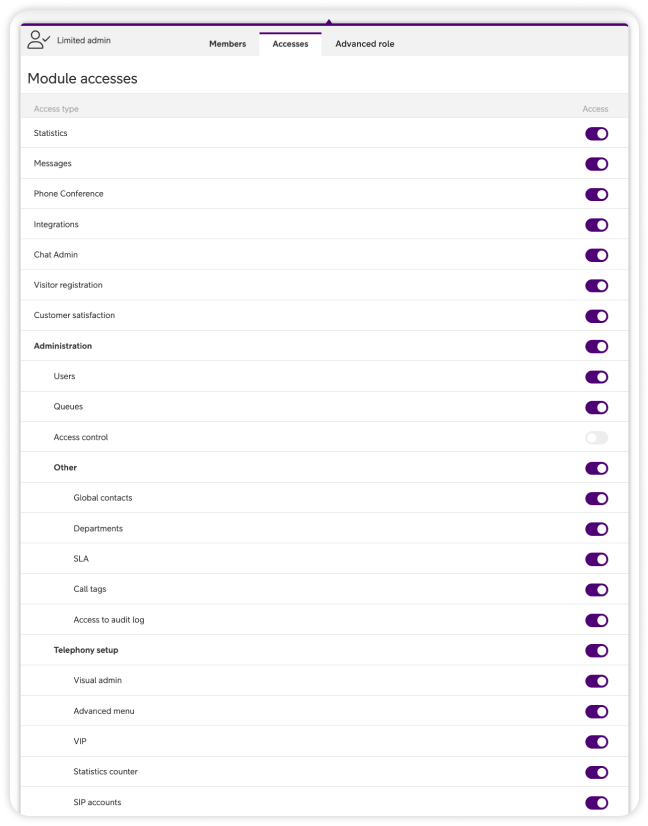
Each role has three tabs: Members, Accesses and Advanced.
You can’t modify the system roles: Administrators, Teamleaders and Users. However, you can create any number of custom roles.
A user can be a member of several roles and gets the combined access of all of them. If a role is deleted, its members keep the access from their other roles. Members with no roles left are assigned the system role Users.
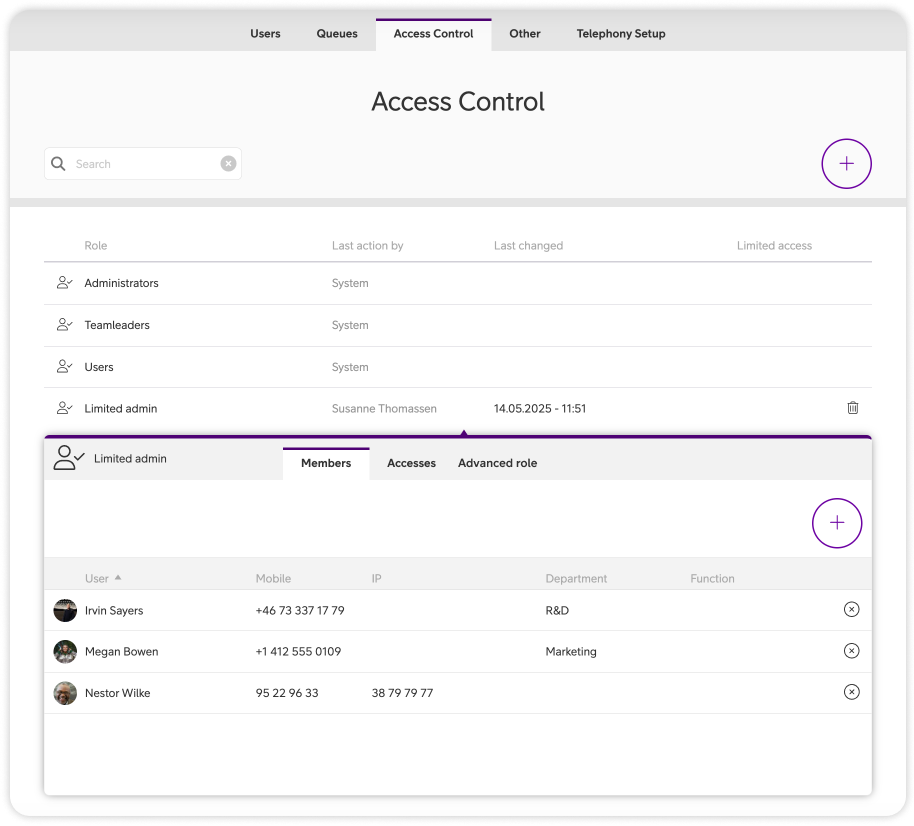
Add a role or modify a custom role
- Click + at the top right.
- Enter a name for the role.
- Under Copy role, choose the role to copy accesses from.
- Click Add role.
- Click the new role and go to the Accesses tab. Turn on the accesses this role should have.
- Go to the Members tab, click + and add the users who should have this role.
To modify a custom role, click it and change its accesses or members. To remove a member, click ⓧ next to their name. To delete a custom role, click the bin icon.
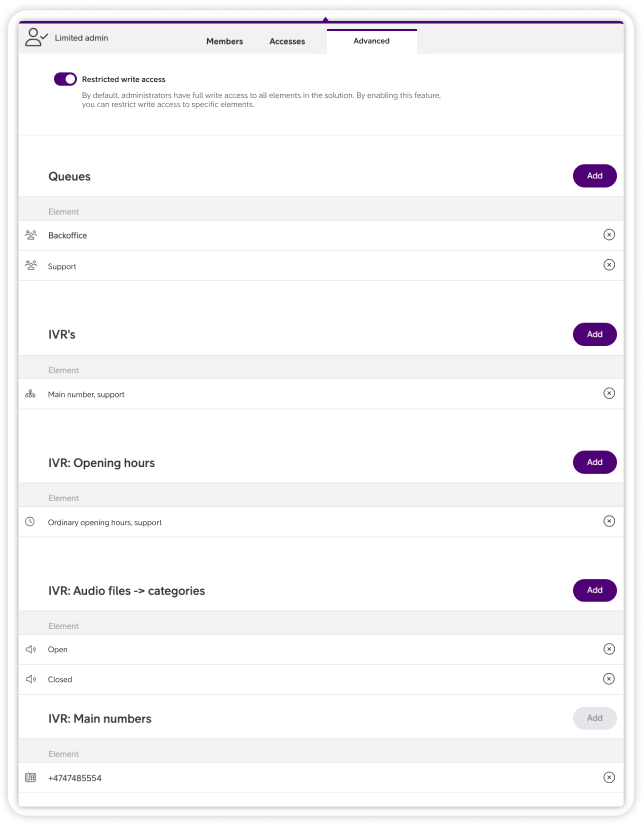
Advanced role
By default, administrators can edit all elements in the solution. With advanced role settings, you can limit a role to editing only specific queues, IVRs, opening hours, audio file categories and main numbers.
- Create a role as usual and set its accesses. For example, a role can have access to Administration in the main menu, but not to Access control.
- Go to the Advanced tab and turn on Restrict write access.
- Click Add next to each type of element and select the elements the role should be able to edit.
Roles with restricted write access are marked with a ✓ in the Restricted access column.
NOTE: If the role can edit IVRs, opening hours, audio file categories or main numbers, it also needs access to Telephony setup under Accesses. For queues, it needs access to Queues under Administration.
Elements a user can’t edit are marked with a red lock. If a user also belongs to a role without restricted write access, they can edit all elements.
User Guides
Here you can find user guides connected to the feature topic. If you can’t find what you are looking for here you might find it in our main user guide archive.
User Guides